


Garage door sensors protect you and your property from a rogue garage door. Without these sensors, your garage door would just keep moving despite any obstructions in its path. However, even garage door sensors eventually need replacing, it’s just a matter of knowing how to replace garage door sensors. Keep reading this blog to learn more about how to replace garage door sensors.
How To Replace Garage Door Sensors
Garage door sensors keep your garage door from closing on anything in its way when it’s in motion, so it’s vital to know how to replace them when they are no longer functional. Read more to learn every step of the process of how to replace garage door sensors.
1. Order The Replacement Sensors
First, you’ll need to identify the brand and type of sensors currently used for your garage door. This information will help you know what replacement to order. There should be some indication on the sensors themselves, or you can consult a garage door technician for assistance. Most generic sensors distributed by Chamberlain and Liftmaster should work with any garage door opening system.
2. Obtain The Right Tools
As soon as you order the replacement sensors, you’ll need to gather the right tools to help you perform the replacement. The right tools in question consist of a crimp wire nut, a screwdriver, and a small object like a wood block to test the new sensors later.
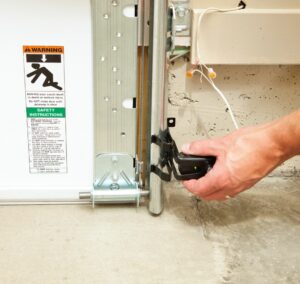
3. Disconnect The Wiring
For this next step in how to replace garage door sensors, you’ll need to disconnect the garage door sensors from the garage door opener. After disconnecting the wiring from the opener, you’ll need to disconnect the wiring from the sensors themselves. Because each set of safety sensors is different, follow the instructions in the manual to know which wires to disconnect or replace if any of the wires are extremely old and/or frayed.
4. Remove The Old Sensors
Once the wiring is disconnected, you’ll remove the old sensors by taking them out of their case. Depending on the sensors you have, this might require using a screwdriver to take them out, making room for the new sensors.
5. Install The New Sensors
Now it’s time to install the new garage door sensors. For this part of how to replace garage door sensors, you will place the new sensors in the cases or brackets that secure them to the sides of your garage. As you do this, you will use a crimp wire nut to connect the new sensors to the appropriate wires. After reconnecting the wiring, take time to ensure the photo eyes of both new sensors are aligned. Finally, you will reconnect that same wiring to the garage door opener.
6. Test The Sensors
This last step in how to replace garage door sensors requires placing a small object in the line of sight of the sensors. You’ll then have your garage door close to see if the sensors detect the item and successfully signal the garage door to pull back open. If the garage door responds to the interference, you’ll have successfully installed new garage door sensors. If not, ask a professional to take a look.
Keep Your Garage Door Sensors In Shape With Garage Door Repair Baytown TX!
Hopefully, you feel comfortable with every step of how to replace garage door sensors. If you aren’t entirely sure about your ability to complete this task, you can always contact a garage door technician for help. Luckily, if you live in Baytown, TX, all you need to do is contact us at Garage Door Repair Baytown, and your garage door sensors will be back to work in no time.